
So I kind of went rogue – I purchased ‘collections’ items
for educational purposes on ebay. I wanted to find some 19th century
photographic materials that were relatively inexpensive; I actually ‘won’ 6
unidentified tintypes.
They were delivered to my house. In the regular sorted USPS
mail. In a standard sized business envelope. I’m not quite sure what I expected
(museum-quality special-made case?) but I felt the pull to house them.
Immediately (which was, arguably the point of the self-driven exercise).

After consulting some pretty great websites, including the
Conserve O Gram, the NEDCC, the Library of Congress and the Book and PaperGroup Annual I felt ready to try. (Note: the more I got into this, the more I realized
I could likely spend the rest of my life lost in it). In short – the best thing
to do for these items is 1) describe (they are unidentified – so use words), 2)
reformat if possible (take a quick shot) 3) protect with paper enclosure –
items were uncased tintypes – acid-free, lignin-free high-quality paper (or if
present polyester sleeves, of which I had none). [Note: paper pros –
inexpensive and protects from light]. 4) label.
Here is my step-by-step of the first one in my new
mini-collection:

Describe:
Unidentified young girl seated next to table. Girl
wears a dress trimmed with lace, white stockings and a bow in her hair. Pink
tinted cheeks. 8.7 x 6 cm.
You will need:
Tintype
Ruler
Pencil
Bone folder
Scissors
X-acto cutting tool
Acid-free/lignin-free piece of paper
(heavier weight is great – like a cardstock)

Note: do not touch the front of the
tintype; handle the photograph from the outside edges – if you are practicing
to be sure the paper is sized correctly, remove the tintype between stages.
1.
Measure your tintype
– cut a piece of paper twice the size (plus 1.5 inches in length). So if your
tintype is 3.5 x 2.5 inches, cut the piece of paper to be 8.5 x 5 inches.

2. Reproduce the size of the tintype (lightly in pencil) in the center of the piece of paper (make sure to keep the extra 1.5 inches in length on the top). Fold, into the middle, the left and right sides of the paper. Bone folder.
 |
4.
Fold up the bottom (also rub down with
a bone folder).

5.
Unfold paper; from the top, cut down a
rectangle (this will depend on your final size) towards the folded flaps where
the length of your tintype would be. Cut straight across the flaps.

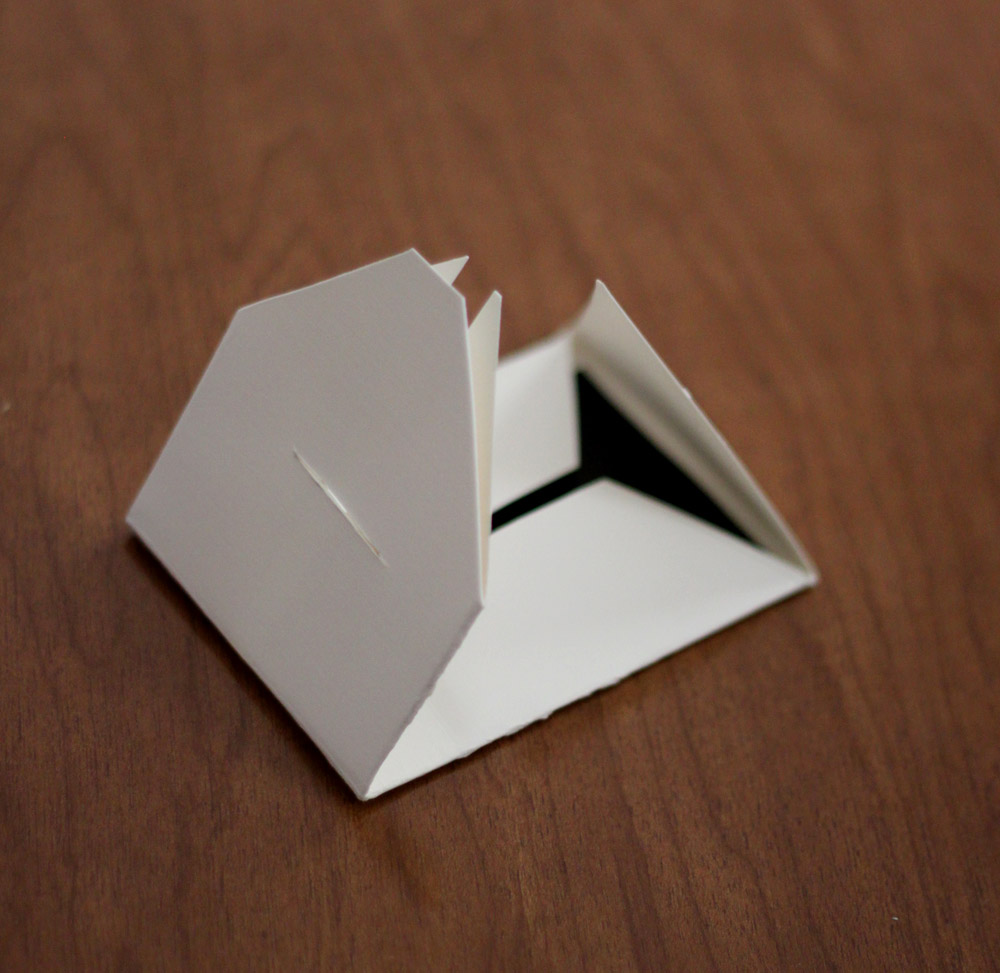
6. Refold; where the point of the triangle meets the folded bottom make a point; using a sharp knife, cut a small straight line approximately 3 cm across.

7. (Just to be sure, unfold and check to make sure your tintype will fit – I tried this several times and it worked out – but you never know…

8. Trim down the bottom fold cutting away two equal rectangle (this will help the enclosure to fold better).
9. Label the outside of the enclosure in pencil.


No comments:
Post a Comment